Search Our Knowledgebase (Mac)
There are Income Items are already created for the program for you to use. They are:
- Regular Pay
- Overtime Pay
- Double Overtime Pay
- Commission
- Bonus
There may be times when you may need to create new Income Items, for example an employee is paid a different rate for a specific task, or for shift differential pay for those who normally work the evening and overnight shifts.
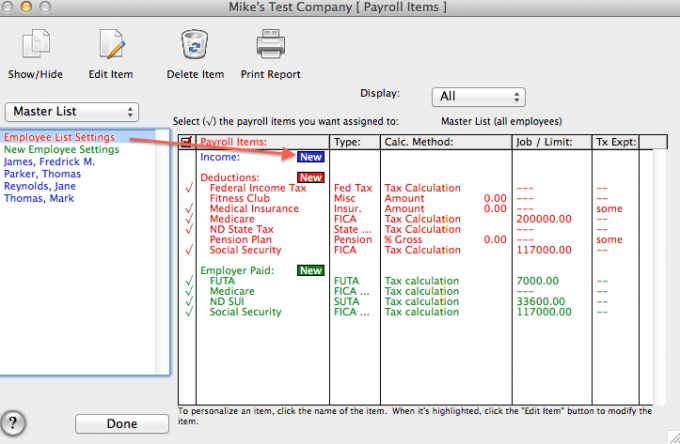
- Go to "Payroll Items".
- If the new Income Item will be applied to all employees, select "Employee List Settings" in red at the top the employees listed to the left.
If the item is for a only a few employees, select one (1) from the list.
- Click on the "New" button in blue across from "Income".

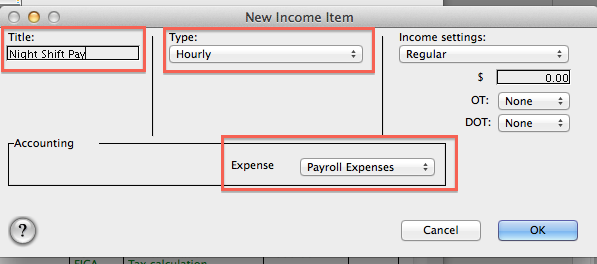
- In the "Title" box, enter a name to appear in the payroll program and on checks for the item being created.
- From the "Type" dropdown menu, choose the appropriate type for the item being created, for example Hourly. If all employees will have the same rate, you can enter it in the "$" box to the right.
If employees will have different rates, leave it set to 0.00.
- The "Income" item being created by default will post to the same account that the Gross Pay is posted to in Quickbooks.
If you have a different account you wish to track this income item in, select it from the "Expense" List dropdown menu.
- Click "OK" to create the new Income Item.

- If employees will have different rates of pay, you will need to personalize the income item for each employee.
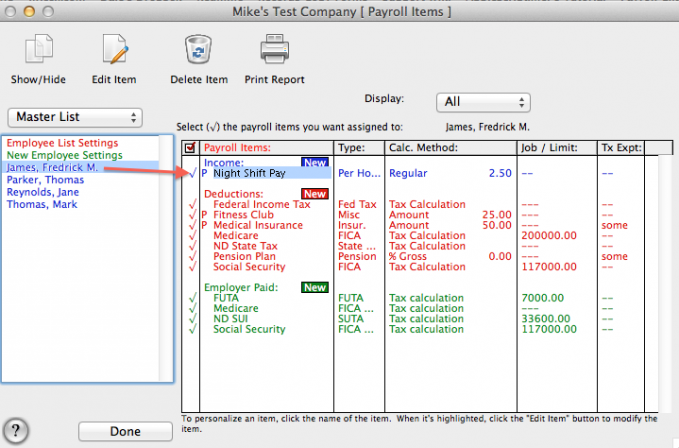
- From the list of employees, select an employee.
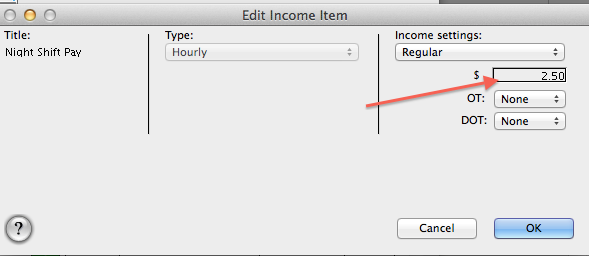
- Double-click on the Income item.
- In the "Edit Income" box, enter the rate of pay for the employee in the "$" box and click "OK".

- You will see a "P" appear with the employee highlighted. This indicates the item has been personalized for the selected employee to use a specific rate.
- Repeat to personalize for employees as necessary.
